
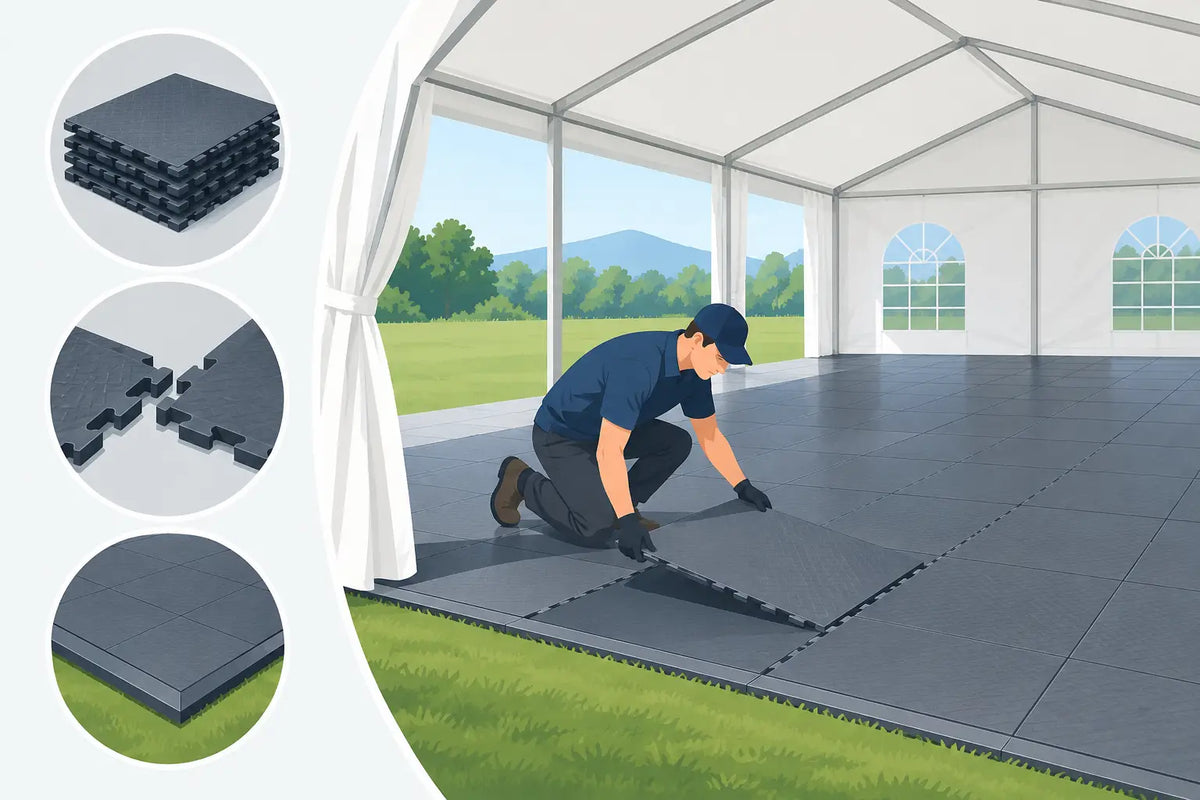
A tent can be correctly installed, properly tensioned, and fully weather-ready, yet still feel unfinished if guests are walking on uneven grass, soft soil, or exposed ground cover. When you set up modular tent flooring, the objective is not simply to cover the ground. It is to create a stable, clean, traffic-ready surface that supports the event plan, protects the site, and gives the finished installation a professional appearance.
For rental operators, venues, caterers, and event production teams, flooring also affects labor time, liability exposure, and the useful life of chairs, tables, staging, and tent components. A rushed installation can leave gaps, rocking panels, poorly supported edges, or trip hazards that become obvious as soon as service begins. The right preparation and installation sequence prevents those problems before guests arrive.
Start With the Site, Not the Floor Panels
Modular flooring performs best when the site has been assessed before the truck is loaded. Measure the usable tent footprint, then account for sidewalls, leg locations, doors, ramps, staging, bars, buffet lines, and any areas where heavy equipment will roll in. A floor that fits the tent dimensions but ignores access points can create an awkward, unsafe layout.
Walk the site and identify grade changes, low spots, sprinkler heads, utility covers, soft turf, loose gravel, and drainage paths. Modular systems can follow minor inconsistencies better than a single rigid platform, but they are not a substitute for a sound base. Significant elevation changes may require leveling, shimming approved by the flooring manufacturer, subfloor support, or a different flooring approach.
Ground condition matters as much as slope. Firm, dry turf may need little beyond basic preparation. Saturated grass, sand, mud, or recently disturbed soil may require ground-protection panels, a load-distribution layer, or a raised flooring system. Consider the expected traffic and point loads as well. A seated wedding reception has different requirements than a festival entrance, commercial trade display, or catered event with rolling hot boxes and beverage carts.
Before installing, remove sticks, stones, debris, and other objects that could create high points beneath the panels. Mow long grass if the event site allows it. Do not install over sharp debris or assume a finished carpet layer will hide an uneven base. It will not correct instability underneath.
Confirm the Layout and Material Count
Commercial modular tent flooring is often supplied in interlocking panels or tiles, with edge pieces, corner pieces, ramps, transition strips, and, in some cases, understructure components. Confirm the panel dimensions and calculate coverage using the actual finished floor area, not only the tent size. It is common to leave portions of a tent unfloored for storage, catering, or low-traffic perimeter areas, but that decision should be intentional.
Plan the orientation of the panels before opening pallets. Running panel seams in a consistent direction generally improves appearance and makes the installation easier to inspect. Where possible, position cut or partial panels along less visible edges rather than at a main entrance or dance floor transition.
Count every accessory before the crew begins. A complete modular floor can require more than field panels. You may need perimeter edging, ADA-conscious access ramps where applicable, corner transitions, locking hardware, connector pins, anchor points, tape, and protective material for the ground beneath. Missing edge components often turn a nearly finished installation into a delayed delivery.
If flooring will be installed inside a tent, coordinate the sequence with the tent crew. Some systems are easiest to assemble after the tent frame is erected but before sidewalls, furniture, and décor are installed. Others may need to be placed before portions of the tent structure are completed. Tent style, anchoring method, site access, and flooring design determine the right order.
How to Set Up Modular Tent Flooring Step by Step
Mark the finished floor perimeter using the site plan and verify the layout against the tent footprint. Check diagonal measurements on rectangular layouts to confirm the area is square. A small alignment error at the first row becomes much more noticeable across a large installation.
Begin from a straight, visible reference edge, typically the front of the tent or the main guest entrance. Place the first panel carefully. It establishes the line for every row that follows. If the system includes a directional locking pattern, follow the manufacturer’s specified orientation rather than forcing pieces together from different sides.
Install the next panels one row at a time, engaging the interlocking tabs, cam locks, or connector system fully. Crew members should inspect each seam as it is completed. A panel that is only partially locked can shift under foot traffic, create a raised edge, or separate when equipment rolls over it.
Do not use excessive force to make a panel fit. When interlocks resist, stop and inspect the base for debris, confirm the panel orientation, and check whether the previous row has stayed straight. Striking panels aggressively can damage connectors and leave a floor that is difficult to disassemble later.
As the floor expands, periodically verify that the layout remains square and that seams are tight. On larger jobs, assign one crew member to quality control rather than having every installer focus only on production speed. That person can check for rocking panels, open joints, missing locks, and unintended changes in panel direction.
Install edge pieces and ramps after the primary field is complete. Perimeter transitions are not cosmetic add-ons. They reduce trip points, make the floor easier to enter with carts and wheelchairs, and protect exposed panel edges from damage. Set ramps at entrances, service routes, and other areas where wheeled traffic is expected.
Manage Tent Legs, Doors, and Heavy Traffic Areas
A modular floor must work with the tent structure rather than interfere with it. Confirm that tent legs remain properly supported and that flooring components do not prevent the tent from sitting as designed. Do not place loose panels over anchor points, base plates, cables, or structural connections unless the flooring system and tent layout are designed for that application.
Doorways need particular attention. A floor edge placed directly at a tent door can become a trip point when sidewalls are opened or closed. Use the appropriate threshold, ramp, or transition piece to create a clean path from exterior grade to the interior floor. Keep exits clear and maintain the required width for the event plan.
Heavy-use zones deserve added planning. Position support or protection where beverage carts, rolling cases, portable bars, refrigeration, staging carts, or high guest traffic could stress panel joints. If a dance floor will sit on top of the tent flooring, verify that the combined system is stable and compatible. Layering products without confirming load ratings and connection details can lead to movement and premature wear.
Inspect Before Furniture Moves In
Complete a final walk-through before tables, chairs, linens, and equipment cover the surface. Walk every entrance, perimeter edge, and primary aisle. Look for raised corners, loose locks, flexing panels, incomplete ramps, visible gaps, and areas where the base has settled.
A practical test is to roll a loaded cart along the service path and across transitions. If the cart catches, rattles excessively, or causes panels to shift, correct the issue before the room is furnished. It is far easier to repair a seam when the floor is open than after a reception layout is in place.
Also check the visual finish. Sweep or blow off dirt tracked in during installation, wipe any visible marks, and make sure panel direction is consistent. Clean flooring supports the overall presentation of a tented event and gives rental customers a product that is ready for immediate use.
Teardown and Storage Protect the Investment
The teardown process begins before the first panel is lifted. Remove furniture and equipment without dragging sharp feet, loaded carts, or metal frames across the floor. Sweep loose dirt and moisture from the surface so debris does not enter connectors during stacking.
Disassemble in the reverse order of installation, starting with ramps and edge pieces. Release locks as designed and lift panels instead of twisting them apart. Sort panels by type as they come out of the tent. Keeping field panels, corners, ramps, and damaged pieces separated makes the next job faster to load and easier to count.
Inspect connectors, tabs, and panel surfaces before storage. Replace damaged components promptly rather than sending questionable pieces back into active inventory. Store flooring flat, dry, and secured on appropriate carts or pallets to reduce warping and simplify transport.
A well-installed modular floor does more than make a tent look finished. It creates a dependable working surface for guests and staff, helps protect valuable event equipment, and gives your operation a more consistent product to deliver. For crews building rental inventory or specifying flooring for repeat use, Special Event Sales can help match commercial flooring components to the tent sizes, traffic demands, and access requirements of the job.